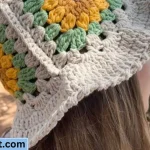
Making your own bucket hat is a fun and rewarding DIY project that allows you to customize your headwear to match your style and preferences. In this guide, we’ll provide you with a bucket hat sewing pattern and step-by-step instructions on how to create your very own bucket hat from scratch.
Bucket Hat Sewing Pattern
Before you start making your bucket hat, you’ll need a sewing pattern to guide you through the process. Here’s a simple bucket hat sewing pattern to get you started:
Materials Needed:
- 1/2 yard of fabric (cotton, canvas, or denim works well)
- Coordinating thread
- Sewing machine
- Scissors
- Pins
- Iron
Pattern:
- Begin by cutting out two circles from your fabric, each with a diameter of approximately 12 inches. These will serve as the top and bottom pieces of your hat.
- Next, cut out a rectangle from your fabric that measures 24 inches long and 6 inches wide. This will serve as the side piece of your hat.
- With right sides together, sew the short ends of the rectangle together to form a loop. Press the seam open with an iron.
- Pin the loop to the outer edge of one of the circle pieces, matching up the raw edges. Sew around the edge, leaving a small opening for turning.
- Turn the hat right side out through the opening and press the seam with an iron.
- Topstitch around the edge of the hat to create a finished look.
- Repeat steps 4-6 with the remaining circle piece, attaching it to the other side of the loop.
How to Make a Bucket Hat
Now that you have your sewing pattern, it’s time to start making your bucket hat! Follow these step-by-step instructions to create your own stylish headwear:
Step 1: Cut Out Your Fabric
Using the bucket hat sewing pattern provided, cut out the necessary pieces of fabric for your hat. You’ll need two circle pieces for the top and bottom of the hat, as well as a long rectangle for the sides.
Step 2: Sew the Side Seam
With right sides together, sew the short ends of the rectangle together to form a loop. Press the seam open with an iron to create a smooth finish.
Step 3: Attach the Side Piece
Pin the loop to the outer edge of one of the circle pieces, matching up the raw edges. Sew around the edge, leaving a small opening for turning.
Step 4: Turn and Finish
Turn the hat right side out through the opening and press the seam with an iron. DIY fashion topstitch around the edge of the hat to create a finished look.
Step 5: Repeat for the Other Side
Repeat steps 3-4 with the remaining circle piece, attaching it to the other side of the loop to complete your bucket hat.
Conclusion
Creating your own bucket hat is a fun and fulfilling DIY project that allows you to express your creativity and style. With a simple sewing pattern and some basic sewing skills, you can make a stylish and functional hat that’s perfect for any occasion. So grab your fabric and sewing machine, and let’s get crafting!
Credit Website: https://www.yahoo.com/